Wednesday, January 21, 2015
Keel Installation Part 1
The installation of the keel is one of those tasks that I have been waiting to accomplish for a long time. It converts a collection of parts (the frames, stem, and transom) into a single part (the primary boat structure). To be sure, there are other parts of the primary structure, namely the chines and sheers. These are also significant milestones and I look forward to accomplishing them.
But the keel holds special significance to me because of the connection of parts that it represents. Therefore, this week when I completed gluing the keel into position, I spent some time pondering where I was in 2012 and where I am now. Admittedly, I had hoped to be much further into the build by now, but things being what they are, I am not. However, I am thankful that I have been able to continue making progress even when it appeared that every possible roadblock would try and prevent me from doing so.
Such roadblocks are still making themselves felt, and I wont go into the details of them. But I will continue to make every effort to move forward in the build, even if it is only a small step such as sanding down some epoxy, or installing carriage bolts for the keel.
So what did I manage to accomplish this last two weeks? Primarily gluing the keel into position, and getting the glue lines cleaned up. I still need to install the wood screws into the frames and the carriage bolts through the stem and knee. Im hoping I can get to those this coming week.
Gluing up the keel was a two step process. The keel is made from two 1" by 4" mahogany planks running most of the length of the boat. One of those was actually two slightly shorter pieces joined together using a scarf joint. I covered this joint last year. The other plank was full length as I was able to acquire a piece of lumber long enough to make this second part.
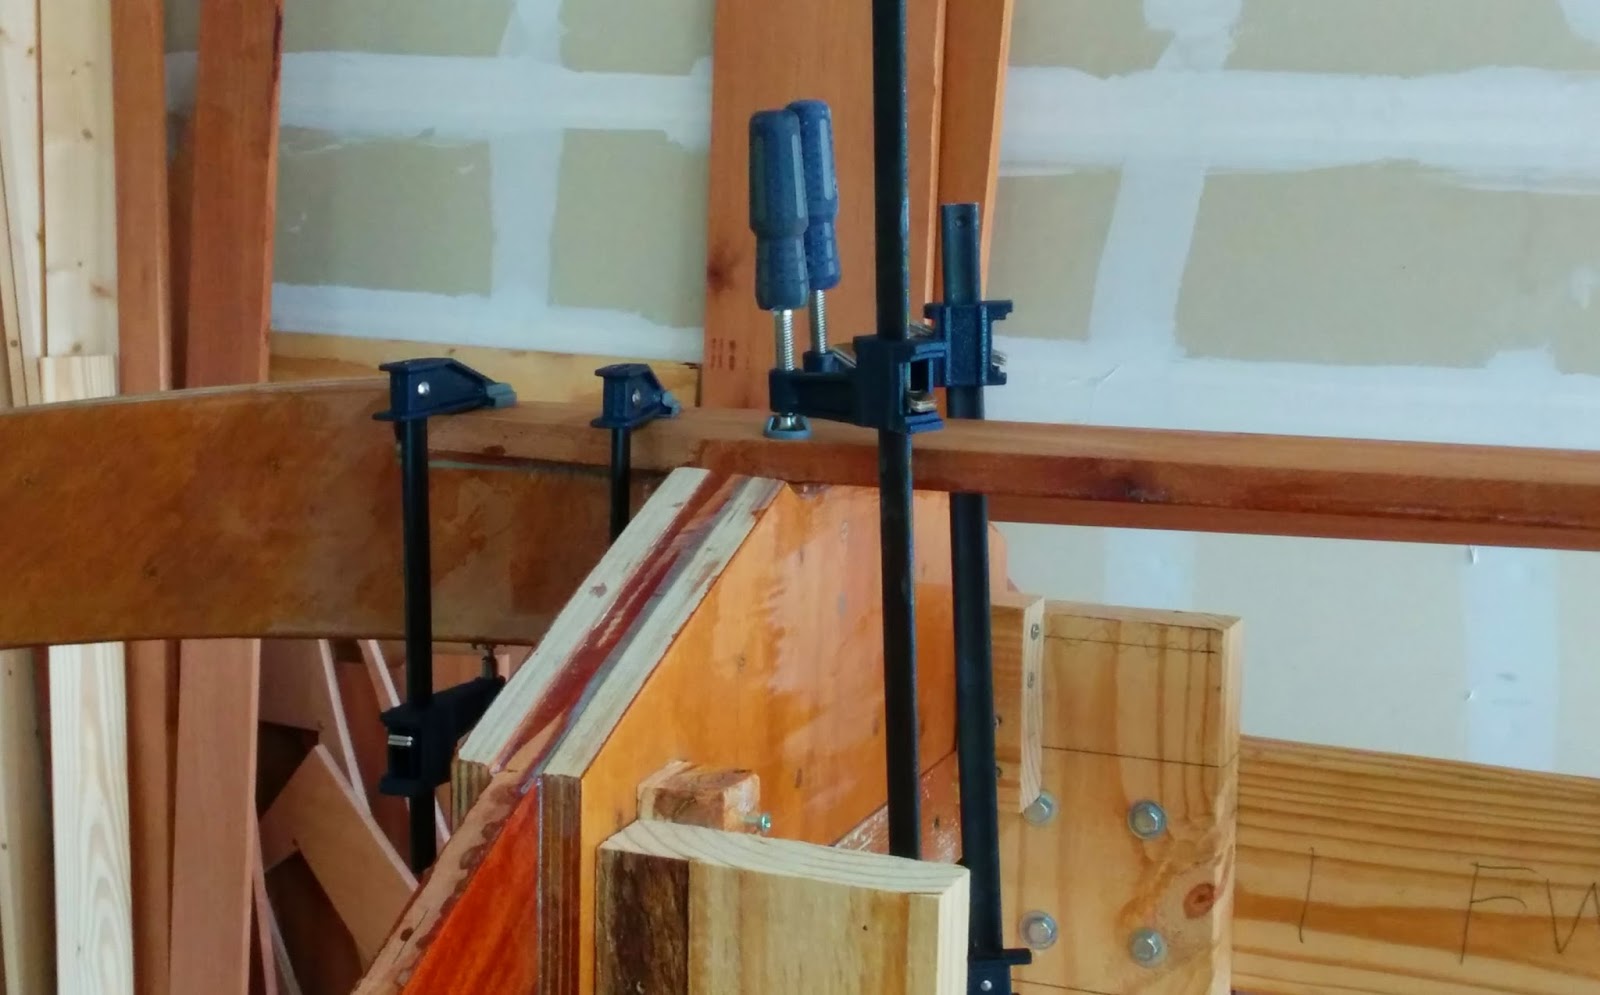
The first plank had to be epoxied to the frames. This was the plank that I had pictures of in the previous posting where I had done some pre-encapsulation of one side. Gluing this into position was fairly straightforward requiring only a few clamps. The main concern was keeping it in the correct position while tightening down the clamps.


But the keel holds special significance to me because of the connection of parts that it represents. Therefore, this week when I completed gluing the keel into position, I spent some time pondering where I was in 2012 and where I am now. Admittedly, I had hoped to be much further into the build by now, but things being what they are, I am not. However, I am thankful that I have been able to continue making progress even when it appeared that every possible roadblock would try and prevent me from doing so.
Such roadblocks are still making themselves felt, and I wont go into the details of them. But I will continue to make every effort to move forward in the build, even if it is only a small step such as sanding down some epoxy, or installing carriage bolts for the keel.
So what did I manage to accomplish this last two weeks? Primarily gluing the keel into position, and getting the glue lines cleaned up. I still need to install the wood screws into the frames and the carriage bolts through the stem and knee. Im hoping I can get to those this coming week.
Gluing up the keel was a two step process. The keel is made from two 1" by 4" mahogany planks running most of the length of the boat. One of those was actually two slightly shorter pieces joined together using a scarf joint. I covered this joint last year. The other plank was full length as I was able to acquire a piece of lumber long enough to make this second part.
The first plank had to be epoxied to the frames. This was the plank that I had pictures of in the previous posting where I had done some pre-encapsulation of one side. Gluing this into position was fairly straightforward requiring only a few clamps. The main concern was keeping it in the correct position while tightening down the clamps.
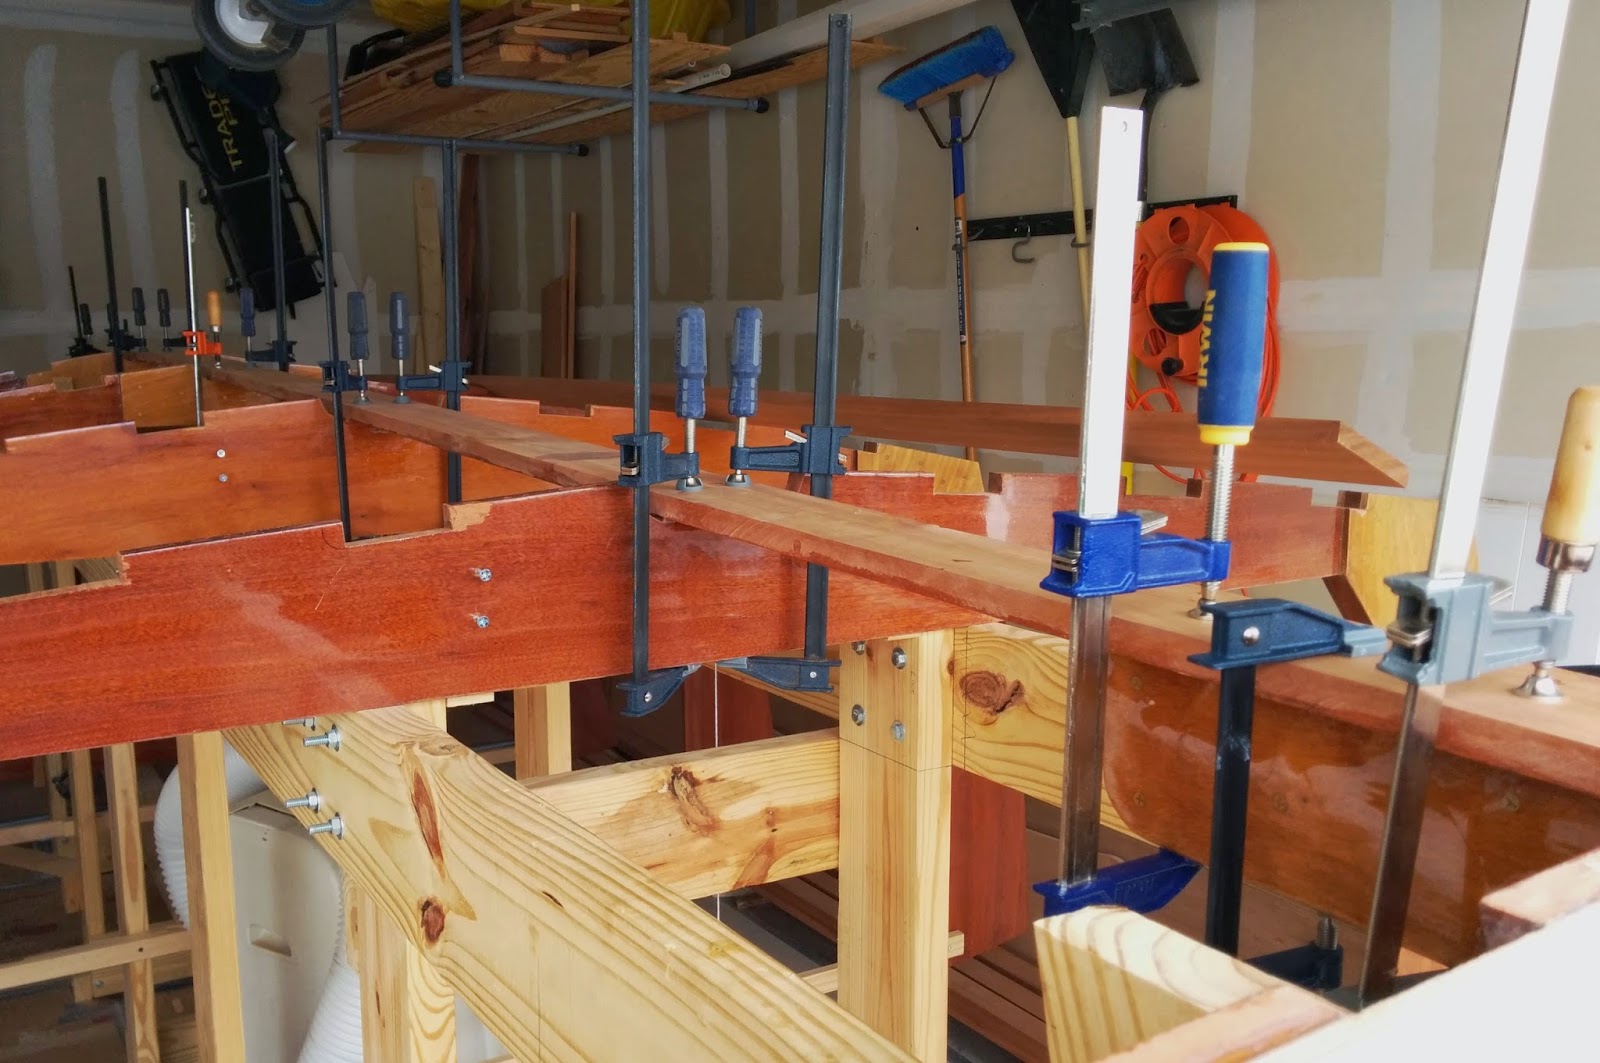
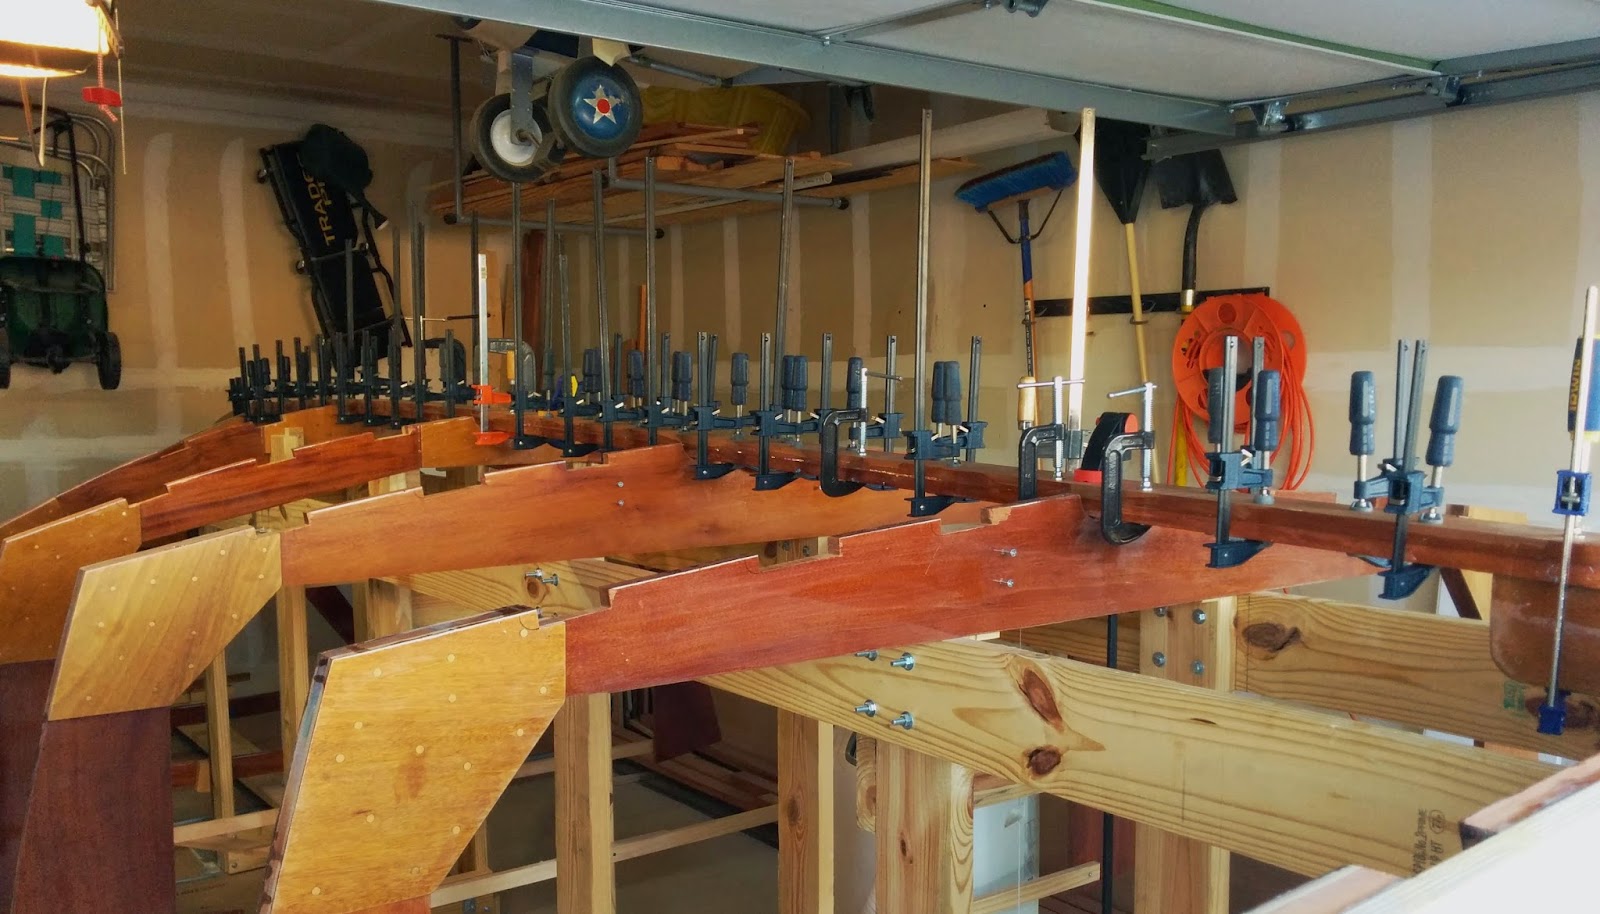
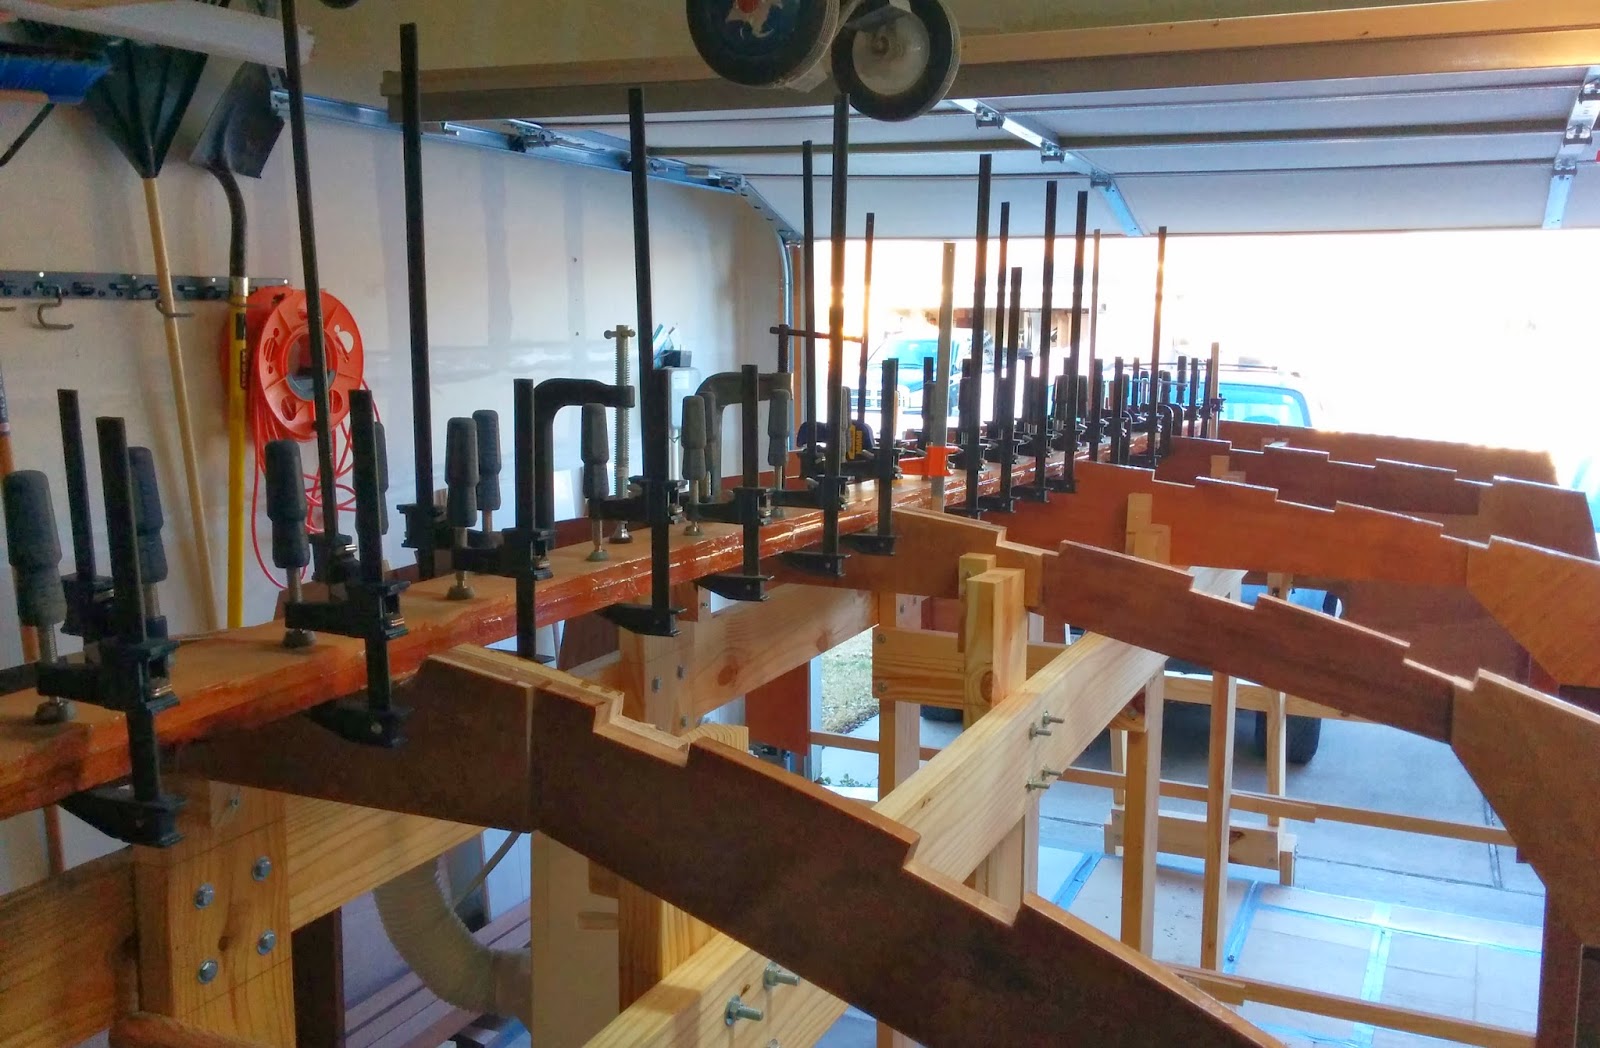
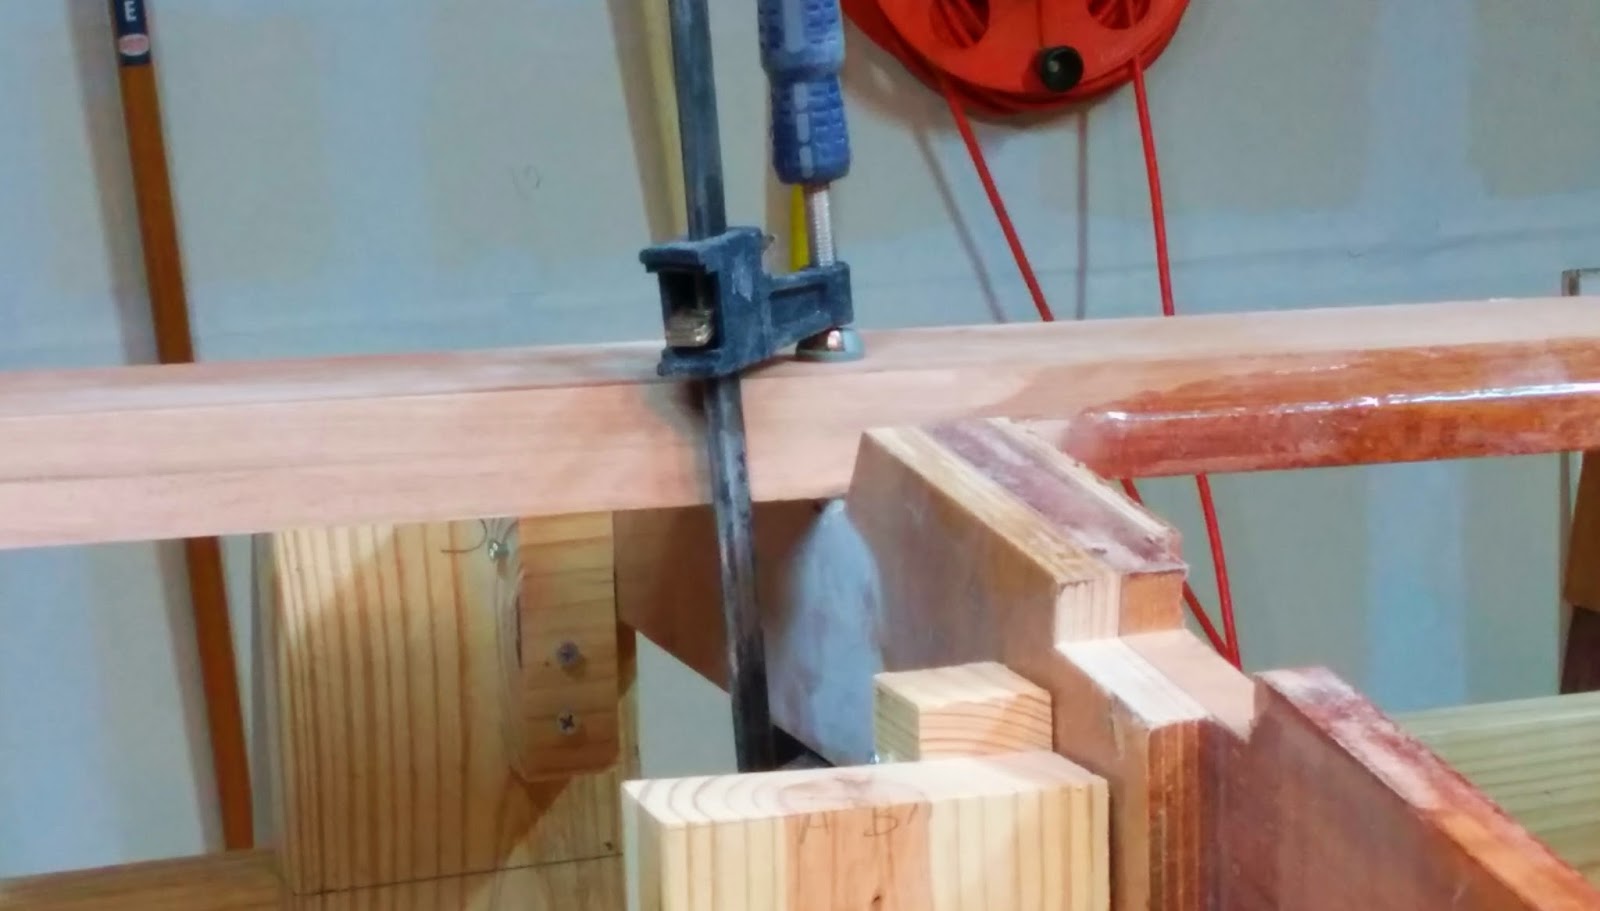
Over the last couple of months I have been purchasing clamps when I could. Laminating the second keel member to the first required many clamps and I barely had enough. I wanted to insure that all points of the keel where adequately clamped together while the epoxy cured.
This second lamination required coating the entire surface of one of the keel members. I pre-coated it first with unthickened epoxy and then added a layer of thickened epoxy. Then I had to flip the part over and lay it down on the first keel member and clamp everything together. Since it was a bit warmer that day, I had to work fast before the epoxy began to set up.
It was a messy job and there was a lot of squeeze out. All of this had to be at least partially wiped off or I would have had a huge job of sanding to contend with. Because of the amount of time it took to get all the clamps into position and insure that both keel members were aligned with each other, I had difficulty wiping off the remaining squeeze out as it started to harden. However, I did manage to get the parts fairly clean before this occurred. You can see in the following pictures the number of clamps I had to use.
Interestingly enough, when I get to gluing up the sheers later on, I will need even more clamps. I estimate perhaps 30 more will be needed. Thankfully, I can get these at the local discount tool store for a reasonable price.
After this second glue up cured, I then spent a few hours over several evenings, cleaning up the glue lines on the keel. I could have probably left this as it was because a portion of the keel will be faired away later on and the remaining part will be hidden under the floor, but my conscious made me take the time to do the task.
At this point, I am ready to add the hardware to add the extra bit of strength to the joints. But I need to acquire two expensive tool attachments (a tapered drill and a larger router bit) before I can continue. Once the connecting keel hardware is in place, I will be moving onto the chines.
The chines are the fairly thick longitudinal members that connect the frame corners together. These parts are curved around the frame corners and take a fairly severe curve at the bow where they connect to the stem. Getting these to bend like this is almost a guaranteed breakage of the wood unless something is done. That something is using steam to soften the wood fibers.
I will go into this process more when I have accomplished some of it, but the basic process is placing the wood into some sort of chamber and adding hot steam to the chamber for a period of time. This causes the wood to become more limber and much easier to bend. I am looking forward to this experience as it represents something I have never done before.
I will have to join the lumber for the chine into longer pieces as I need approximately 23 foot long pieces for these. This means I will be using scarf joints as I did with the keel . The fun part will be getting the long pieces to fit in my 21 foot garage!
So until next time, take care.......
Subscribe to:
Post Comments (Atom)
0 comments:
Post a Comment